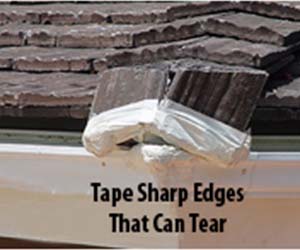
Cover any sharp edges that might tear the material with duct tape or rags. Be careful that the shields do not catch on vent pipes or other obstacles.
Here are some things to keep in mind that will make it easier and safer to protect your home during a bushfire or wildfire event.
There is no one right way to wrap a structure, but there are some easy basics that help get the job done. Make spure you start with a plan. You may feel unsure in the beginning but once you position some material it quickly makes sense.
Break the project into panels or blocks, IE.. The roof, then the front of the house, then the right side, then the back and so on. Assemble the tools you need. Something to prop up the roll to spool off material to cut to size. Staple guns and staples, chicken wire and cutters, tape measure, ladders and step stools, scissors or retractable knife, needle nose pliers for staple removal, sunglasses if deploying during the day, soaker hose if deploying water, and any others you might need. Have your sandbags filled, helpers ready, and start as early as possible to beat the winds. The best time to install is early in the morning or late evening before the winds pickup. Always be careful when working on ladders, roofs, and transporting material in wind near powerlines.
First, measure a panel and cut the Fire Shield to length. Attach the fire shields to the structure so they are firmly held in place. This is usually done with staples. When doing walls start at the bottom and work up so your overlapping seams don’t allow a gap for firebrands. Make sure to use a large Sharpie pen and outline windows and glass doors so you know where under the wrap. This way a ladder won’t be throw against the wrap and break the window. On removal, carefully remove staples with needle nose pliers, mark each panel’s location, lower front, upper front, right side lower etc. Fold or roll the material for reuse on next fire.
Once the structure is wrapped secure it for the wind gusts with chicken wire. Remember the winds will attack the structure for hours so make sure there are no loose flaps that can be pulled off. The chicken wire should be stretched and stapled as needed protecting seams, corners, and eaves. It is inexpensive insurance and reusable.
The first time you wrap a structure it will take longer. Make sure you have 3 or 4 people to help for 4 or 5 hours. It may go faster but the second time you wrap it will take half the time it did the first time. That is about the same amount of time it would take to spray with foam. Once your shields are up your home is protected for days, weeks, or until you take them down. And your home will be cooler because all that heat is reflected away, a big air conditioner without the power bill.

Cover any sharp edges that might tear the material with duct tape or rags. Be careful that the shields do not catch on vent pipes or other obstacles.
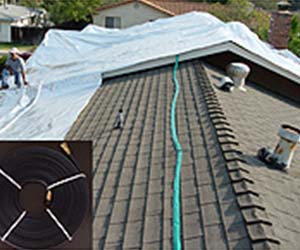
If you are using water under the shields, highly recommended, place your hose on each side of the roof peak with the sprinkler holes facing down. Do not turn on the water until you are done. SHIELDS ARE EXTREMELY SLIPPERY WHEN WET! If large branches or high heat reaches your shields as temp rises under the sheilds in severe situations steam will form robbing oxygen and stoping ignition.
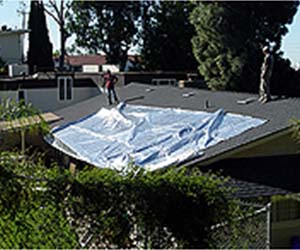
Next unpack your fire shields and carry them to the roof. Unroll the shields anticipating where the edges will be when you unfold the wings.
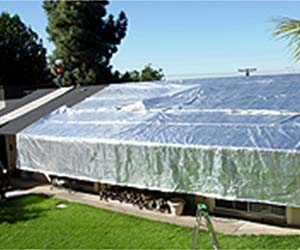
Anchor the top part of the shields with sandbags or weights before you allow the bottom half to hang over the eave. Allow enough material to tuck under the eave and go down the wall at least 2 feet. Allow path for the water to flow against the wall under the shields for maximum protection.
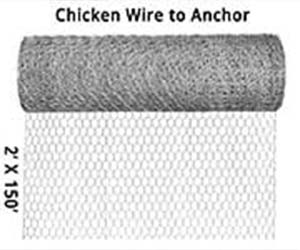
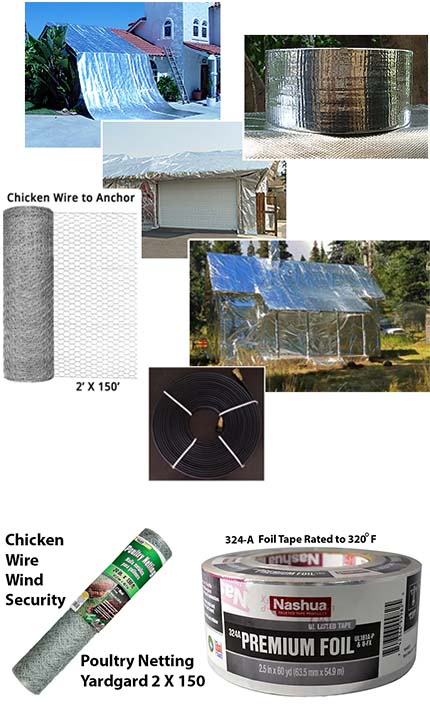
Use staples or chicken wire to anchor shield material. Remember winds can and will blow up to 40 MPH OR MORE during the fire. Make sure all seams and edges are secure and there are no holes where embers can enter. For best results use chicken wire and for long running seams you can use Nashua 324-A High Temp Foil tape. This tape is rated to 320 degrees F and is available at Home Depot and other online retailers.
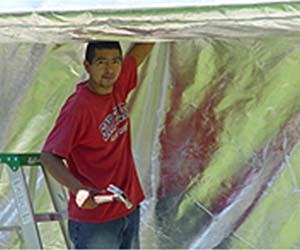
To wrap your first wall measure the lenght you need, spool it off, and cut with scissors. Wrap from the bottom up so the upper piece overlaps the bottom. Place the next wrap above the bottom wrap and staple in plance. Continue around the house and when done anchor and stretch the chicken wire along any seams, stretch it tight and staple securely. The more chicken wire you use the more wind resistant your wrap will be.
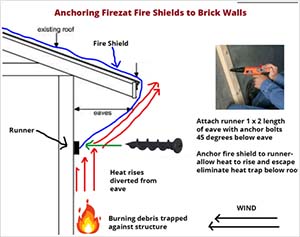
Most stucco or brick homes are fire resistant to start with but they may have wooden eaves, wooden fascia boards, or roofs that are not fire rated. The best way to cover a roof and anchor the Fire Shields on these types homes with the least impact is by following the diagram.
Secure a board using a drill and molly screws in a key place the length of the wall and another on a far side of the structure. Attach the Fire Shield to the board. You can then attach chicken wire to the 2 X 4 or board firmly and stretch it over the wrap for more protection. Each case will be different but you want the fire shields to be against the walls and roof with the least amount of space possible.
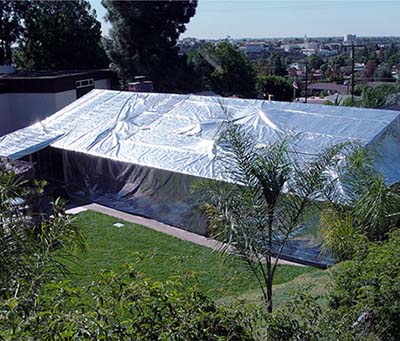
When finished your home should be secure and properly sealed. CAUTION: Fire shields are slippery when dry. Be extremely careful when walking on them with wet shoes. If you have extra shields place them on the area that faces the fire assault for double protection. Two layers of fire shields provide ultimate protection.
Be extremely careful with your fire shields near power lines and power supplies running into your home via the roof. DO NOT TOUCH ANY POWER LINES WITH YOUR HANDS OR THE FIRE SHIELDS. Also do not allow the wind to blow the material into a power line. Tie weights or sandbags to the end of the material that will be nearest the power lines prior to positioning the shields.
If you intend to wet your roof wait until after you have deployed your fire shields. They are extremely slippery when walked on and when they are overlapped or wet they will be very slippery. Wetting after the shields are on will slow evaporation and keep the moisture on your roof much longer.
Use extreme caution when using ladders and walking on your roof. Make sure your roof is strong enough for people to walk on safely. Read the Firezat Disclaimer for more information.
Firezat makes no claims or statements, or offers any assurance or assurances, guarantees, promises, either direct or implied, as to the effectiveness or suitability of its products to protect any property or possessions from fire damage or any other calamity whether anticipated or foreseen. Due to the extreme conditions of high heat, high winds, low humidity, and unpredictability associated with all fires it is impossible to make such guarantees. Before using, the user agrees to assume all risks and liabilities in connection with deployment, application, use and/or storage of Firezat Fire Shields. Sellers and manufacturers only obligation shall be to replace any unused Fire Shields found to be defective within one year from the date of purchase. Please see Disclaimer for complete disclosure.
